New Glider Upgrades
Introduction:
If you’re reading this you’ve probably just hit max level in Archeage! Congratulations! If you’re not level 50 then good on you for pre-reading.
Archeage endgame is vastly different to any other any MMORPG, in a lot of other titles you usually need to acquire X amount of arbitrary stat to for example enter Onyxia’s Lair and kill the Lich King. Archeage is a sandbox game. In simple terms this means that in Archeages endgame you really can do whatever you want!
- You wanna build boats and launch naval warfare on the Kraken? You can do that.
- You wanna get good gear and never leave the crafting station? You can do that.
- You wanna become the King of Alchemy and dominate the auction house? You can do that.
- Want to set up a circle of illegal tree farms? You can do that.
- Want to explore the depths of the ocean and get some phat treasure? You can do that.
- Want to gank lowbies and take their tradepacks? It may be a scumbag move, but you can do that!
- Dungeons and raids your thing? Well we’ve got a few of those.
- Want to own a small farm and live a simple life planting mushrooms? YOU CAN DO THAT.
- Arenas your thing? Yep. Archeage has Arena.
- Want to betray your faction and spend your days sailing the high seas as a pirate? You can do that.
TL:DR THE WORLD IS YOUR OYSTER. MANY ACTIVITIES AND PATHS. CARPE DIEM.
This guide aims to educate you in all the things you can do, how you can do them and the benefits for doing them.
Gearing up – Where do I begin?!
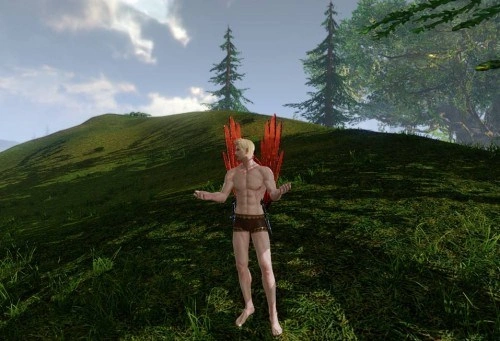
Video on Gearing up at Endgame
Some people prefer to listen/watch a video than read! We like to cater to everyone, so here it is: https://youtu.be/ctEDrPLatok
Starter Gear
For your endgame adventures you are going to need some awesome equipment to get you started. A variety of seemingly oddly placed quests in Hasla and Karkasse Ridgelands award randomized gear which could be awesome or could suck. Pray to the RNG gods that it is awesome as you can only get this gear once. Here is where you can find it:
As a side-note: If you’ve quested in Hasla and/or Karkasse Ridgelands you may already have the majority of this gear.
Weapon
Primary Weapon:
- Sword (1-H)
- Nodachi (2-H)
- OR Staff (2-H)
Quest: In Line of Duty (Hasla) – To unlock this quest you will have to complete 3 prerequisite quests around the area of the quest giver these are: Restoring Their Senses + The Sick and The Plagued + Chasing Rumors
Secondary Weapon:
- Bow
- Shield
- OR Lute
Quest: Fertilizer Formula (Hasla) – This quest involves killing 5 doe. Hard stuff for a seasoned adventurer, right?
Armor
Head:
- Helmet
Quest: The Shaman of Dragonroar (Karkasse Ridgelands) – Side-note: This quest has 1 prerequisite quest which is The Minotaur’s Madness
Upper Armor set:
- Chest
- Wrists
- & Hands
Quest: Good for the Heart (Hasla) – This quest involves killing Deer. XLgames really don’t like deer do they?
Lower Armor set:
- Legs
- Feet
- & Waist
Quest: The Redscale Cheftian (Karkasse Ridgelands) – Side-note: This quest has 1 prerequisite quest which is Capture a Wyrmkin which can be found on a NPC called Praus, once you’ve completed this you can go to Jeyon to get the Redscale Cheftian quest
So that’s pretty much it for your basic starter level 50 set. So now what?
Hasla Weapons
Located in south-east Hasla there is an arena where a variety of plant mobs spawn. When these mobs are killed they will award one of six tokens. 150 of a c ertain token can be forged together to make Hasla Weapons which will most likely be a MASSIVE upgrade to any weapon you already have.
- Token of Courage – Bow
- Token of Honor – 1-H Sword
- Token of Conviction – 2-H Staff
- Token of Sacrifice – Lute
- Token of Loyalty – 2-H Axe
- Token of Fortitude – Shield
Whenever the in-game time reaches 18:00 (This is roughly every 4 hours in real world time) a Rift will open up above Hasla and spawn an absolute TON of mobs. There will be standard and elite mobs in this Rift. The elite mobs will drop stacks of 15-20 of a certain token when defeated. The best thing to do when this Rift spawns is to grab a huge group of friends and try to tag and defeat all the elite mobs you can. This will allow you all to obtain fat stacks of tokens and thus quickly farm your weapons.
The Hasla Rift has roughly 5 different phases, each phase ends when all of the elite mobs have been defeated:
- Lots of Scorpions
- Even more Scorpions
- EVEN MORE SCORPIONS
- Yaksa (Large stone men)
- Cursed Giant Stone Golem (Due to the difficulty of this boss, it is rarely killed unless you outnumber the opposing faction by at least 50-100 people)
Be warned however Hasla Weapons are very high in desire. There will likely be players trying to farming their weapons at all times of the day.
The best thing you can do for Hasla Weapons is bring a small group of players and be co-ordinated with who is rolling on what. E.G You have a tank who rolls of the fortitude tokens, a caster dps who rolls on the conviction tokens, a melee dps who rolls on the loyalty tokens and a archer dps who rolls on the courage tokens etc.
Pro-tip: You can combined all 6 tokens plus a vendor material that costs 6g to get a stack of 5 of any token. This can be a useful trick to speed things up if you have large stacks of gold and find yourself farming a weapon solo.
Kroloal Cradel (KC)
Located in South-east Rookborne Basin this dungeon is the perfect farming place for endgame accessories (Earrings, Necklaces, Rings etc) It’s a level 45 dungeon that’s significantly easier than Greater Howling Abyss and arguably the perfect place to quickly snag some upgrades. Guess what doesn’t exist yet? A kroloal cradel guide. I’ll make one soon-ish TM!
Greater Howling Abyss (GHA)
Locate in Northern Hellswamp this dungeon drops a ton of level 50 starter gear. The majority of the dungeon can be cleared in entirely level fresh 50 gear. Most groups struggle when they reach the third boss. For first timers this dungeon will likely take 1-2 hours, but once you’ve run it a few times you can easily wittle that down to 30 minutes. If you’re looking for guidance on this dungeon you should check out self-proclaimed ‘IRL Girl‘ Pohx Kappa who has a guide which can be found here: Pohx’s Greater Howling Abyss Guide
Crafted Gear
Unless you’re a healer it’s pretty pointless crafting weapons. This is because the Hasla weapons will likely be a lot better and accessible than any weapon you can craft without spending insane amounts of time, gold and archeum. For crafted gear it can be better or worse for a fresh level 50 player. This all depends on how good your randomized gear from the Hasla/Karkasse Ridgelands was. The first thing to do is identify what are you weakest pieces of armor in terms of the quality of that item and beneficial stats provided for that item slot. Archeage crafting is very different to most other MMORPGs. If you’re not already savvy with Archeage gear crafting there are a few things you need to know: You can’t just craft max level gear, you need to initially craft the lower levels of gear as the are a component used to craft the next level of gear.
So to craft a level 50 piece of equipment you will need to go through and craft a total of 7 pieces of gear:
- level 20 (0 Proficiency required)
- level 24 (1,000 Proficiency required)
- level 30 (2,500 Proficiency required)
- level 34 (5,000 Proficiency required)
- —————— This is where gear starts to become potentially better than quest reward gear ——————
- level 40 (10,000 Proficiency required) – Conqueror’s
- level 44 (20,000 Proficiency required) – Illustrious
- level 50 (30,000 Proficiency required) – Magificient
- level 50 (40,000 Proficiency required) – Epherium
- level 50 (50,000 Proficiency required) – Delphinad
Everytime you upgrade your armor you have a small chance to increase the quality of that item. It’s suggested that you continually craft the level 24 armor until you get a blue quality proc, then continue to upgrade that piece of armor from there to ensure it’s at least an acceptable level by the time it reaches level 50. If you’re lazy it’s likely level 50 gear will appear on the Auction House in a couple of weeks time, but it’s probably better you personally craft it as the gear on the Auction House will most likely probably be inferior gear with bad quality and stat procs. If you’re looking for a guide on how to level your Leatherworking, Metalworking and Tailoring professions quickly, follow this link: How to level your armor crafting professions quickly.
PVP (Player Versus Player)
Honor
Honor is a currency that you will earn for pretty much every PVP related activity you do. You can spend your honor on a ton of different stuff. Some of the stuff you can buy from honor is not bound, so if you’re short on cash you can buy stuff to sell to other players. However this isn’t really advised for fresh level 50 players who want to progress in the world of PVP as you’ll definitely need that honor to buy upgrades!
What activities reward the most honor for the time invested?
- Crimson Rift daily quests
- Winning 5v5 arena
- Winning 1v1 arena
- PVPing in most zones during a War (Provided there are a lot of enemies to PVP)
- PVPing in a Halycona during a War with a large group
So to summarise the above list. If there is a zone that’s currently in war that you know will be buzzing with players, that is most likely the best place to go and farm your honor. The only place you can really guarantee the buzz of players is in Halycona because of the additional PVP mechanics and objectives that become active during a War. If you’re the king of 1v1 you can gain phat stacks of honor by just spamming 1v1 arena and winning. If nothing else is going on 5v5 arena is a nice and enjoyable way to gain honor.
None of the above activities require you to have a group or a guild, however if you do have a group/guild you will most likely have a much easier time.
What should I spend my honor on?
Now the first question you want to be asking yourself is do you want short term or long term benefits for spending your honor?
Short term benefits:
Lunastones and Lunagems
- Lunagems are socketed gems that can applied to your gear
- Lunastones are enchants that can be applied to your gear
The majority of expensive and high tier lunagems require that the piece of gear they are being applied to is level 50. The weapons and armor you got from the initial level 50 questing do not any level associated to them, so a lot of the lungems won’t work on them. For fresh 50’s you will only be able to use the really cheap and weak lunagems and lunastones, which still can provide that little bonus if you’re looking for a short-term benefit to your character. There are a variety of the cloaks that can be purchased with honor. Each one of these cloaks provides a break to several different CC effects. These are arguably BIS as if you die in PVP it’s usually because you get overpowered with CC. The biggest downside to these cloaks is that they only last 10 dau I say short-term benefit as it’s likely you’ll replace your current/questing gear within a few weeks. Sidenote: If you’ve managed to acquire a Hasla weapon you’ll probably want to get a Honorbold Lunastone on it as soon as possible, as it’s likely you’ll be using this weapon for quite some time
Long term benefits: If you’re looking for long term benefits via spending your Honor you should save up for an item called Honor Token: 5th Rank Soldier. This perminantely increases Strengths, Agility, Stamina, Intelligence, and Spirit by +4. This item costs 15,000 honor. From there on you can upgrade this to gain a bonus of between a 6 to 25 increase to all of your stats. Keep in mind that the later ranks do cost a shed-ton of honor however. Stuff you probably shouldn’t buy:
- Experience Potions
- Growthstone
- Any of the weapons purchased with honor (These are expensive and not only do they suck, they also only last for 45 days)
Open World PVP
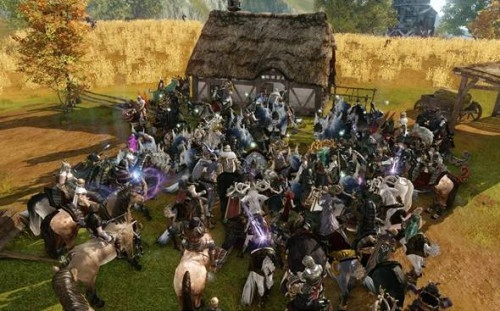
You’ll want to keep your eye on 8 different zones for open world PVP
- Halcyona
- Sanddeep
- Hellswamp
- Rookborne Basin
- Windscour Savannah
- Perinoor Ruins
- Hasla
- Karkasse Ridgelands
Zone PvP Phases
Halcyona
Halcyona cycles from a 4 hour peace period -> 15 minute conflict period -> 1 hour 20 min war During a War additional objectives in Halcyona spawn. Participating in the war and completing certain objectives awards Warrior’s Medal. These can be used to purchased arguably BIS endgame necks.
You gain Medals of Halcyona by:
- 1 Medal – Completing a simple talk to your captain quest everytime the War starts (This can be picked up in Sun’s End)
- 1 Medal – The first time you loot a supply crate during a war (Supply crates spawn randomly throughout Halcyona and drop healing wells and large AOE poison and fire nukes)
- 3 Medals – When you infiltrate the enemies base and defeat the enemy teams Relic
Winning Halcyona also spawns a flag in Sun’s End that you can click to gain a 2 hour buff that provides 10% increased drop rate, 10% increased xp from labor and +4 honor for killing (only +1 if you are or you kill a leech)
Simple Halcyona Strats:
5 minutes into the War (As soon as the zone is on the 1:15m timer) a flag will spawn on the road just east of sun’s end. This flag acts a trade package. The first faction to capture this flag and return it to their base will active their bases cannons. These cannons deal INSANE damage to any enemies that get close/into their base. So basically the faction that captures this flag pretty much ensures that the opposing faction will not be able to infiltrate their base and kill their crystal. This means the faction who can win Halcyona is essentially decided within the first 10 minutes. So once a team has captured the flag they will then want to push onto the enemies base. Before pushing onto the enemy base your faction will want to round up everyone they can. The enemies base has 4 guards and 1 guard captain that all hit insanely hard, even on tanks. The guards will come in two packs of two and the guard captain can be pulled on it’s own. For the two guards you’ll want someone who can kite one of the guards while everyone else deals with the other one, a Stonearrow or Primeval is brilliant for the kiting job. To easily kite a guard just keep out-ranging him and occasionally shoot them when you’re 25m+ from the guard to ensure that you continue to generate agro. Don’t be afraid of going too far out as it isn’t a problem if you reset one guard as it won’t reset both of them. The guard that is being nuked can be chain CC’ed with no diminishing returns. So everyone should just CC the crumbs out of him and with a raid of 40+ people this should be no problem. The guard captain is the easiest one to nuke. Just spam CC while you nuke and congrats you’ve won. Once all the guards are dead it’s time to start nuking the Relic. The Relic has a lot of health (Roughly 3.7 million) and thus will take some time to kill, so watch your back to ensure your enemies don’t get the jump on you while you’re nuking it down and congratulations you have won.
Arena
There are currently two different types of arena in the game 1v1 and 5v5. 1v1 is more rewarding, but requires decent gear, mad skill and a viable 1v1 PVP spec. 5v5 is less rewarding honor wise however pretty much every spec has a viable use in it and you can gain special titles which slightly increase your maximum health and honor gain.
1v1 Arena
You can join 1v1 arena by talking to a Gladiator recruiter. You can find these by going on to your map -> merchants -> Gladiator recruiter. You’ll most commonly find this recruiter in your capital city. This arena is very straightforward. Essentially you are thrown into a Gladiator Pit with another player, the first person with 2 kills wins. Quick and easy. The biggest downside to this arena is that only a small niche of specs (Darkrunner, Skullnight, Daggerspell etc) are both awesome and viable for 1v1 PVP. Also the fact that more geared players can absolutely dominate fresh geared players don’t really make 1v1 arenas the best place to start for PVP beginners.
5v5 Arena
You can join 5v5 arena by talking to a Arena recruiter. You can find these by going on to your map -> merchants -> Arena recruiter. You’ll most commonly find this recruiter in your capital city. This arena has a few odd and interesting mechanics. The more kills you get the more unique arena abilities you unlock. These abilities range from summoning wolves and cannons, buffing yourself with a choice of increased damage or damage reduction, 20 second damage immunity, a full heal and more. Most of these abilities you can only use once. The aim for 5v5 arena is simple: The team with the most kills before the timer runs out wins. It’s all about killing. Ranged should take advantage of the towers and bridge in Arena whereas melee should slyly attempt to stop them from getting to unreachable or difficult points, also if you’re playing a melee shadowstep is definitely your friend here. Once you get to terms with the arena map it can be easily navigated so that you can quickly search and destroy. If your team lacks and a healer and you need to quickly top up on health retreating back into your base will restore your health and mana.
You’ll also notice some PVE mobs across the map, flame and life ones:
- Flame mobs drop a stick of dynamite when killed. You can throw this Dynamite at players and/or crates. This can actually destroy the large wooden crates around the arena which can be helpful if someone is roflpwning you with LOS hopping on a certain crate. Certain AOE attacks that various skillsets have also damage and destroy crates.
- Life mobs drop a temporary max health increase for 3 minutes when killed. Usually it isn’t worth your time to kill these, however if you want a bit more health for a short duration you can!
- Pain mobs drop a small damage reduction buff that lasts for 3 minutes when killed. This buff is slightly more useful than the max health increase and it’s arguably whether or not it’s worth taking the time to kill these mobs.
5v5 also has an in-arena quest line associated with it, which offers further arena progression. The quest chain is called Rite of the Gladiator and the only objective for it is to kill opponents in arena. Each time you complete a Rite of the Gladiator quest it rewards a nice little chunk of Honor and at Rite of the Gladiator 3, 6, 9, 12 and 15 you’ll get a title which increases max health and honor gain at the end of arena:
- 3 – Increases max health by +20 and honor gain at the end of arena by +1
- 6 – Increases max health by +40 and honor gain at the end of arena by +2
- 9 – Increases max health by +60 and honor gain at the end of arena by +3
- 12 – Increases max health by +80 and honor gain at the end of arena by +4
- 15 – Increases max health by +100 and honor gain at the end of arena by +5
Unfortunately the increased honor gain at the end of arena only seems to apply to 5v5 arena and not 1v1, but the additional health is pretty nice.
PVE stuff!
World Boss Hunting
There are a few level 50 world bosses scattered through the world. Killing world bosses drops gear, enchantments, gold and an assortment of other goodies. The main functionality of these bosses is for acquiring phat stacks of cash and archeum. It will likely take an organized group of 30+ players to down any of the following world bosses, that’s providing nobody tries to gank you and your raid! Hasla: Hanure the Hunter Stormraw Sound: Morpheus (This is the only video I could find of Morpheus, it just displays the location really. I’ll replace this with a tutorial soon-ish) Freedich Isle: Pirate Captain Langley (This is the only video I could find of Pirate Captain Langley, it just displays the location and some general mechanics really. I’ll replace this with a tutorial soon-ish) It’s worth nothing that the Rift in Hasla and the Crimson Rifts in Cinderstone Moor and Ynystere also spawn several world bosses in the later stages. These bosses are quite challenging, especially the ones spawned by the Crimson Rifts.
Sea of Drowned Love
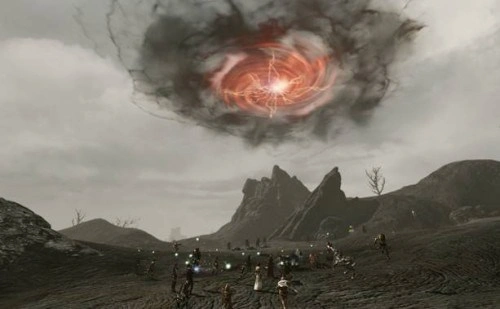
This is a dungeon that is only available on weekends. I don’t believe it is currently implemented in the game. I will have more information on it coming soon TM.
The Kraken
The Kraken is located in the Northern parts of the Arcadian Sea. Where exactly is he you ask? Well nobody ever knows. He is a kraken, a large ravenous seabeast that roams the seven seas. He likes to move about. The Kraken is arguably the pinnacle of group/guild achievement at the moment and is not something an individual or small group of people will even come close to killing. A Kraken kill takes a well organized fleet of at least 10+ galleons and 40+ players to down. But to those of you brave enough to attempt to slay this mighty beast his booty includes arguably the strongest weapons in the game as well as a ton of tentacles (trade packs) that can be exchanged for phat stacks of gold. We’ll be releasing a full Kraken Strategy in the near future, but for now all you need to know is to build lots of galleons and stock up on those cannonballs.
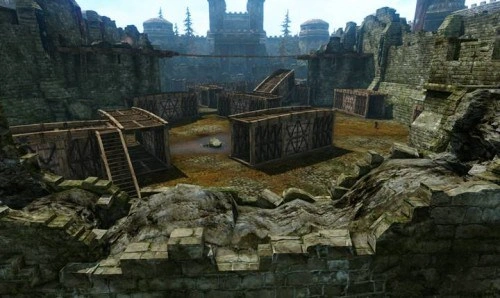
Crimson Rift
At 12:00 in-game time in Ynystere and Cinderstone Moor a Crimson Rift will spawn. This Rift will spawn several waves of enemies accompanied by a series of world bosses. The waves of enemies are an objective for daily quests located in both zones:
- Crimson Omens 1: Kill 20 Crimson Army Infantry Men and Archers: 50 honor
- Crimson Omens 2: Kill 20 Crimson Army Soldiers and Reserves: 150 honor
- Crimson Omens 3: Kill 20 Crimson Army Commanders and Spearmen: 300 honor
If you gather a group of 25+ players you’ll be able to complete the daily quests in a matter of minutes thus resulting in 500 honor for under 10 minutes work. The boss waves are often left unkilled due to there high level of difficulty.
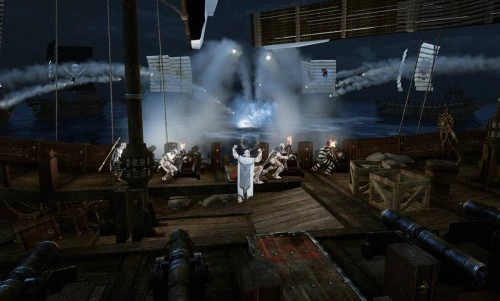
Auroria
Auroria is a continent dedicated to level 50 gameplay. This area is currently unavailable and if you manage to reach it you will be teleported out within a matter of seconds. Auroria will be released in the coming month(s) and will greatly expand endgame progression when it launches.
Making cashmoney
Making money is a large part of Archeage endgame. So large that we’ve dedicated a whole section on the website to it that can be found here: Seatin’s Archeage Money Making Guide
Improving your characters performance Lunastones and Lunagems
We’ve previously touched on Lunastones and Lungaems. Here’s a bit more of an explanation in regards to what they are and how they work:
- Lunastones – Lunastones are enchantments that can be applied to a piece of gear. There are multiple ways of obtaining these such as via drops, honor and crafting.
- Lunagems – Lunagems are socketed gems that can be applied to a piece of gear. You’ll notice most of the gear that you acquire has a lungagem slots. When you first socket a lunagem it has a 100% to successfully socket, if you try to socket additional lunagems you have an increasing chance to destroy not only the gem you’re trying to socket, but all of the other lunagems in that piece of gear. Yep. RNG is a fun game to play. lunagems can be crafted or acquired via honor.
Food
Unlike other games. Food can be used in combat! In longer fights most classes will find themselves heavily mana starved, so it’s always suggested you carry phat stacks of food for emergencies. It’s suggested you carry both:
- Vegetable Bread – Restores health
- Vegetable Soup – Restores mana
Health and Mana Pots
There are a large variety of mana and health pots in Archeage. If you want to ensure you can recover from those “OH SNOWFLAKES” and mana starved moments you’ll want to ensure you have at least a small stash of mana and health pots. The cost of these pots varies on the strength of the pot you’re after. I’d suggest scanning the Auction House or consulting your nearest Alchemist for prices. A special thanks to:
- Reaver (Pidgeon Boy)
- Lone
- Kriticalhits
- Del
Share this:
Be the first to comment
Recent Posts
Recent Posts
Archives
September 2024
Categories
Uncategorized


LEAVE A COMMENT
YOUR EMAIL ADDRESS WILL NOT BE PUBLISHED.